Robot Class
We use the motorhat library to setup the motorhat with the correct address passed in. We then create the motor objects. Since we have 4 motors this means we use create for 4 distinct motor variables. We also import the atexit library so that motors stop once the code exits.

We then define the convert speed function which takes a value from 0 to 100 where 100 is the maximum speed and 0 is stationary. So the percentage is then applied so that a portion of 255 is the output speed. This value known as the outspeed will be entered into .run() method.

The convert speed function also checks whether the speed is positive or negative. If the speed is negative then robot will go backwards and if it is positive, it will go forward.
We also create a stop motors method which will run after the program exits using the atexit.register method and will turn off the motors.

Movement
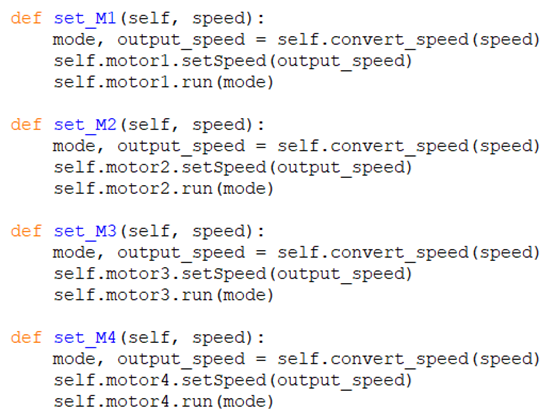
We then create set_M# methods where the output of the convert speed method is used to set the motor speed and which direction it will turn: backwards or forwards. We repeat this for all four motors.
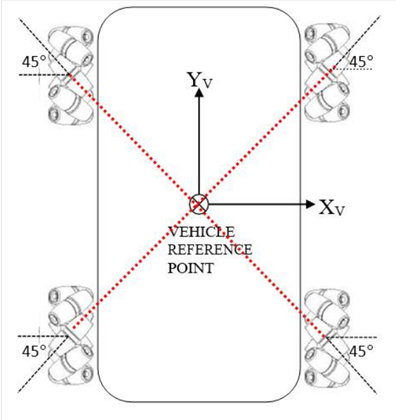
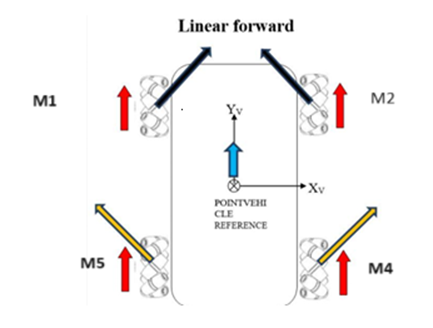
Now we can define functions for each of the directions of travel for the robot. We can figure the movement of the robot using vectors. Firstly, the wheels are in an X configuration.
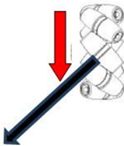
This is what direction the force vector will act in when the wheel is moving forward.
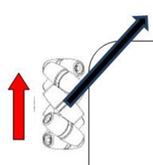
And this is what direction the force will act in when the wheel is moving backwards. The force acts perpendicular to the bearings.
Lets start with linear forward:

The same logic applies for backwards and it is relatively straightforward what the method will be.

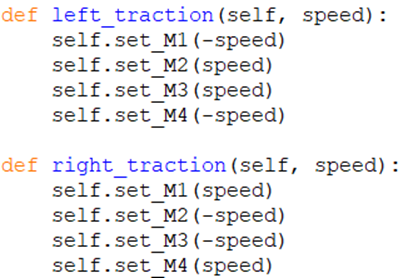
Now we can set the one for left and right traction.
Rotation
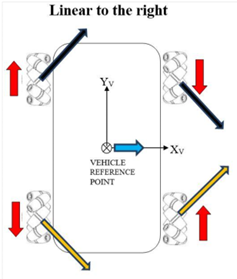
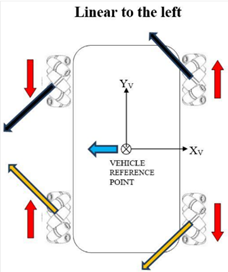
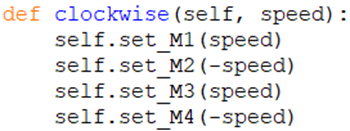
Now we can do some vector addition to work out what combination of wheel spin directions will produce the movements we want such as clockwise rotation, anticlockwise rotation, reverse, forward, left traction and finally right traction. Hence, if want the wheel to spin backwards. We can have a parameter speed and set the forward motors to speed while the backwards motors are set to -speed.
As we can see from the diagram, we need to have all the motors in forward mode in order for the robot to go forward. Therefore, we define the following method.
If we set M2 to be negative and M4 to be negative, we see their force vectors flip. So the force look like the following.
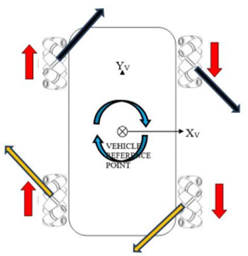
Now we can set the clockwise method to be the following:
Repeating the same process for anticlockwise:

integrating with PS4 controller
As we can see from the diagrams, for left traction M1 and M4 need to be negative and for right we have M2 and M3 being negative. Therefore, we have the following.
And we are done. We can now integrate this so that these movements can be called in response to remote control commands.
Integrating Robot movements with PS4 controller commands.

First, we install the required package of pyPS4Controller using the sudo pip install command. Now we can write the code.
Earlier we defined various methods for the robot to move. We can import the methods by importing the file of the previous code, which in this case is robot.py. Along with this we import the pyPS4Controller library and time.

We then create a robot object r. So that we can call the appropriate methods.

Next, we create a Mycontroller class which will contain the methods of what to do depending on different button presses.
Add comment
Comments